


Learning how to use gpt image 2 to generate infographics is one of the fastest ways to turn a long transcript into a visual people actually read. Meetings, lectures, and interviews all produce huge amounts of audio, and almost nobody wants to scroll through a wall of plain text to find the point. Video Transcriber AI closes that gap with its Summary Infographic feature, which pairs a summary of your content with a template, then uses GPT Image 2 to turn it into a polished graphic. This guide walks you through how to use gpt image 2 the smart way, including the eight built in templates and when to reach for each one. Once you master how to use gpt image 2, every recording you own becomes a potential visual asset. From that point on, how to use gpt image 2 is just part of your daily routine.
What Is GPT Image 2?
GPT Image 2 is an image generation model built to follow detailed instructions and produce clean, readable visuals from a text prompt. It stands out from earlier image models in one specific area: it can render text and labels inside an image with far fewer mistakes. That matters enormously for infographics, where a misspelled label or a garbled number ruins the whole graphic. Once you learn how to use gpt image 2 for this kind of work, you stop worrying about whether the title will come out right and start focusing on the content itself. That peace of mind is the real payoff of understanding how to use gpt image 2 well, and it is why so many teams now treat how to use gpt image 2 as a core skill.
Why GPT Image 2 Excels at Infographics
Infographics are not just pictures. They combine layout, hierarchy, icons, charts, and short text into one readable whole. Most image models handle the "picture" part but fail on the "readable text" part. GPT Image 2 is tuned to keep labels legible and consistent, which is exactly what an infographic needs. When you use GPT Image 2 inside Summary Infographic, you get the benefit of that strength without having to hand craft a prompt from scratch, because the template already encodes the layout for you. That shortcut is the heart of how to use gpt image 2 in a real workflow, and it removes the guesswork from how to use gpt image 2 altogether.
GPT Image 2 vs. Plain Text Summaries
A plain text summary asks the reader to read every line. An infographic built with GPT Image 2 lets the reader see the structure at a glance. The difference is easiest to see side by side.
| Aspect | GPT Image 2 infographic | Plain text summary |
| Reading style | Scanned in seconds | Read line by line |
| Key points | Highlighted as visuals | Buried in paragraphs |
| Shareability | High, built for social media | Low, rarely shared |
| Text accuracy | Reliable labels with GPT Image 2 | Always accurate, but dull |
| Creation effort | Minutes with Summary Infographic | Fast to write, slow to consume |
Once you see the two options next to each other, the appeal of learning how to use gpt image 2 becomes obvious: you get the accuracy of text with the pull of a visual. That tradeoff is the reason so many people start learning how to use gpt image 2 in the first place, and it is exactly why how to use gpt image 2 keeps coming up in content teams.
How to Use GPT Image 2 to Generate Infographics: Step-by-Step
Here is the hands on part. You do not need design skills, and you do not need to write a prompt from scratch unless you want to. Follow these four steps and you will know exactly how to use gpt image 2 for any content you already have.
Step 1: Upload or Transcribe Your Content
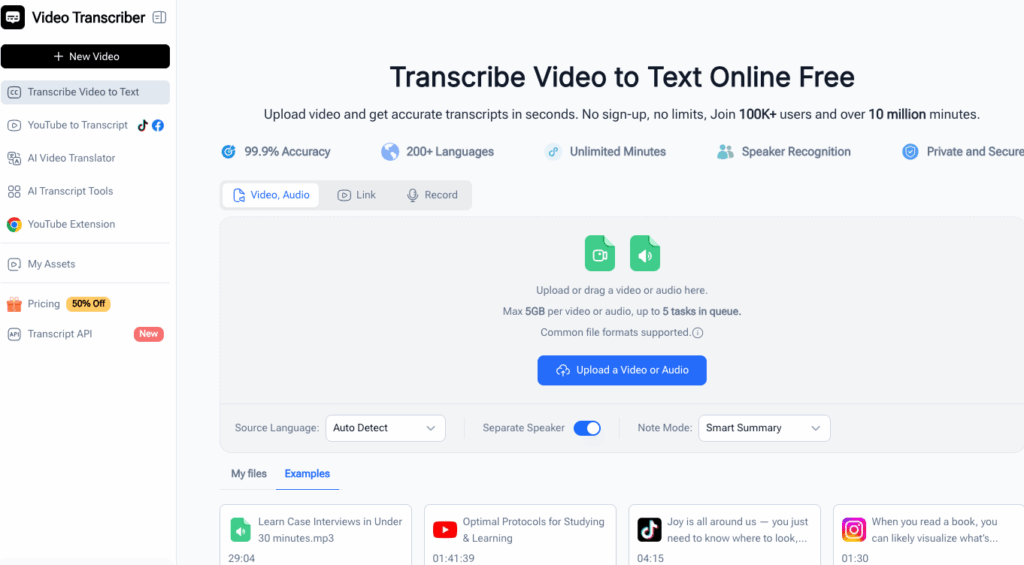
Open Video Transcriber AI and start with your source material. You can upload an audio or video file and let the tool transcribe it, or paste a transcript you already have. This is the raw material for everything that follows. Whether it is a lecture, a meeting, or an interview, drop it in and move on. This first step is the foundation of how to use gpt image 2 for real content.
Step 2: Generate a Summary
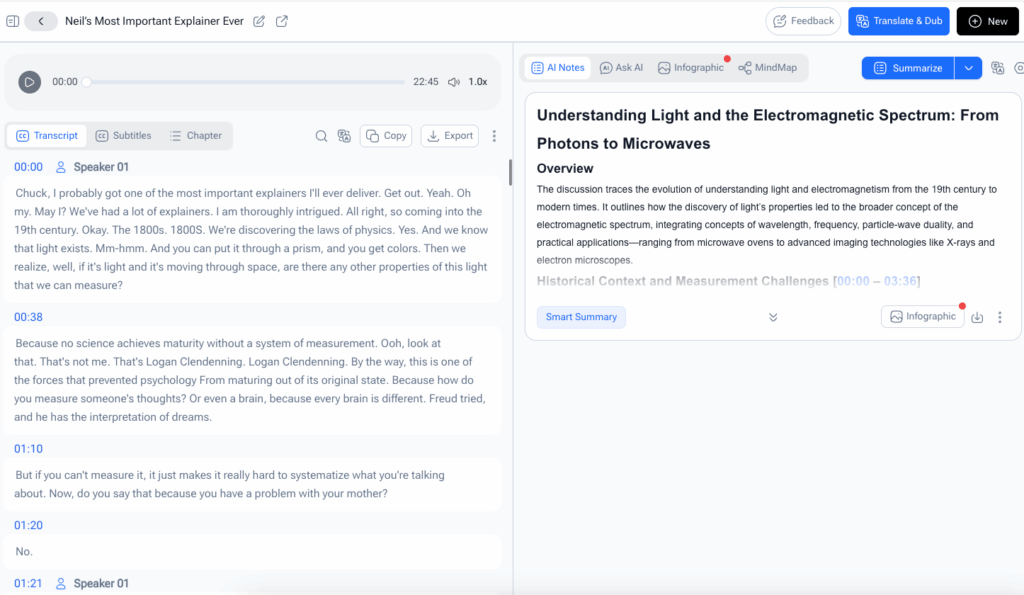
Once your transcript is ready, generate a summary. The tool pulls out the main points, key takeaways, and action items, so the signal rises above the noise. This summary becomes the content that fills your infographic. It is the bridge between a long recording and a tight visual, and it is the first half of how to use gpt image 2 effectively: feed it clean content, and it gives you a clean result. This stage is where how to use gpt image 2 starts to feel rewarding.
Step 3: Pick a Template or Write a Custom Prompt
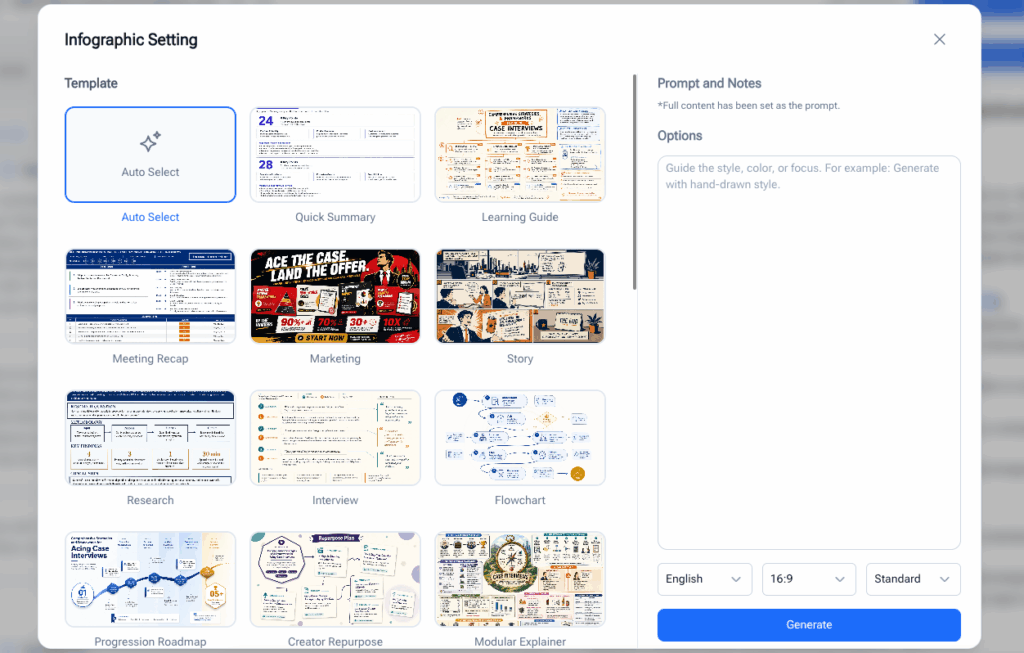
Here is where the eight templates come in. Pick the one that matches your content type, whether that is a meeting recap, a study guide, or a marketing poster. If none of them fits, you can write your own prompt to describe exactly what you want. This flexibility is what makes how to use gpt image 2 feel effortless: the template handles the layout, and you only worry about the message. Choosing the right layout is the most creative part of how to use gpt image 2.
Step 4: Generate and Download
Hit generate and let GPT Image 2 do the heavy lifting. In a moment you get a finished infographic with your summary, your chosen layout, and legible labels. Download it, share it, or drop it into your notes. If something feels off, tweak the prompt and generate again, because the first version is never your last. That is the beauty of how to use gpt image 2 for iteration: change a phrase and try again.
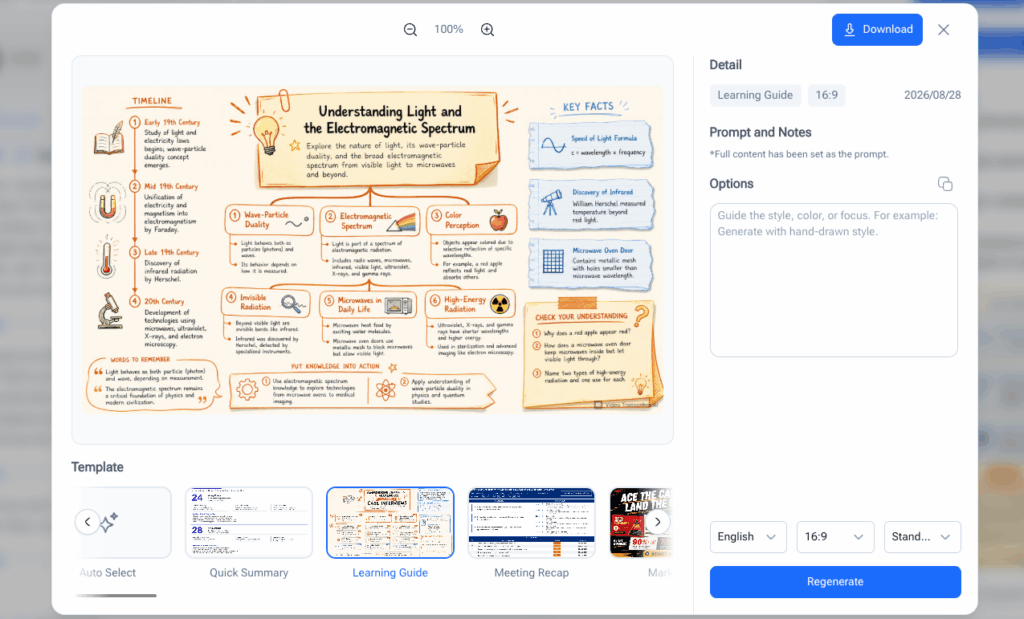
8 GPT Image 2 Infographic Templates (and When to Use Each)
This is the heart of the guide. Summary Infographic ships with eight ready made templates, each designed for a specific kind of content, which makes how to use gpt image 2 a simple matching game. Here is how to use gpt image 2 with each one, and when to pick it. Bookmark this section, because knowing how to use gpt image 2 across all eight is a genuine superpower.
1. Quick Summary: The All Purpose Template
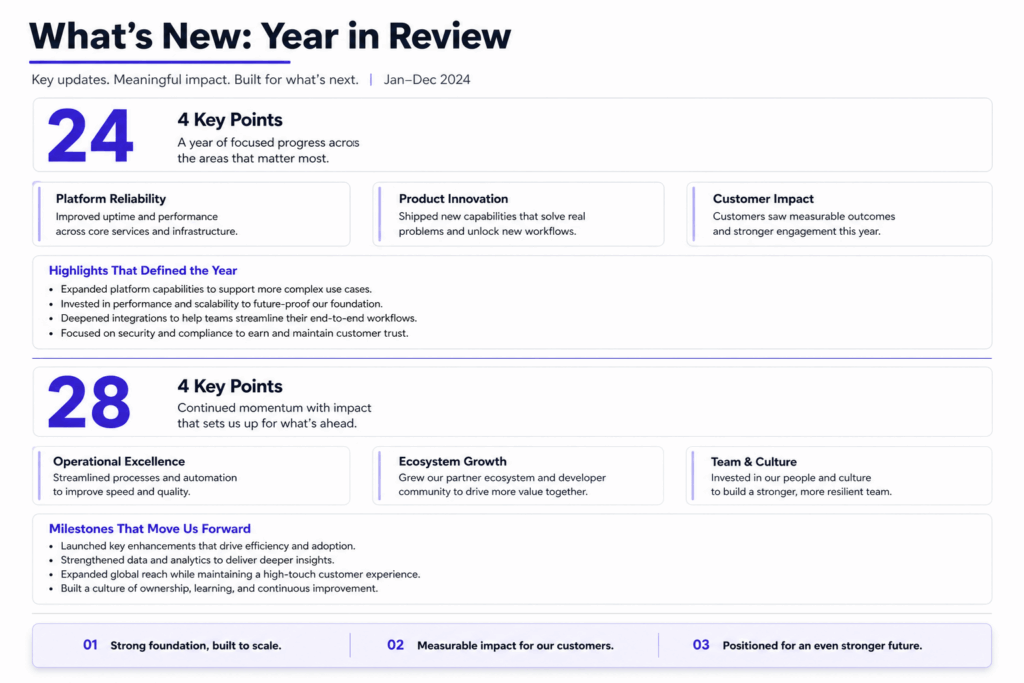
Quick Summary is the default choice, and it earns that spot. It produces a neutral, modern executive summary on a clean off white canvas: a bold title, a row of large stat numbers, a few mini cards, and a closing takeaways box, all in a single refined accent color. Reach for it whenever you are not sure which style fits, or when you need a polished recap of almost anything. It is the safest starting point in any how to use gpt image 2 workflow, and a great first stop when you are still figuring out how to use gpt image 2.
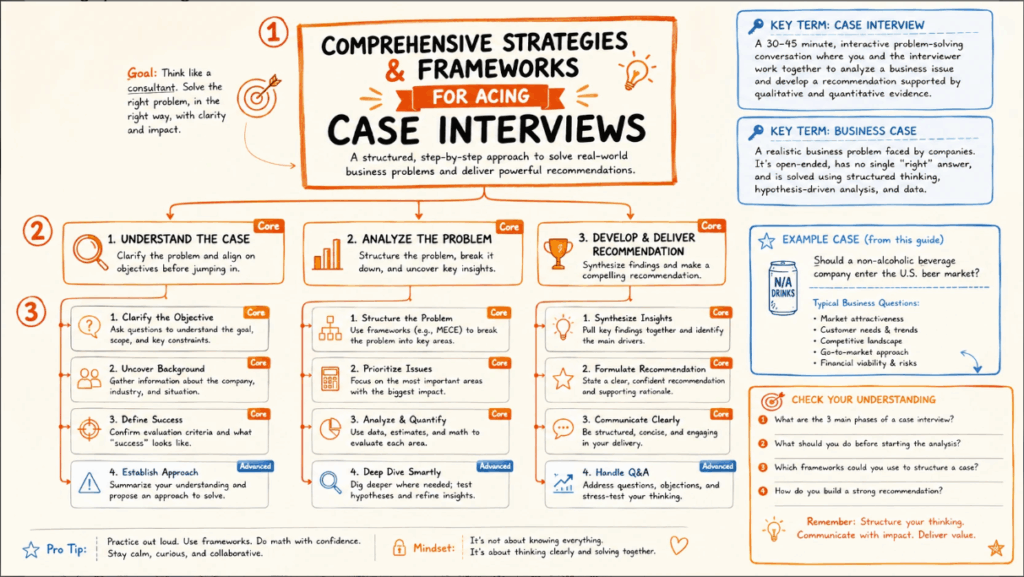
2. Learning Guide: For Teaching and Study Notes
Learning Guide turns content into a warm, hand drawn study sheet. A central concept sits in a sticky note panel, with sketched arrows branching out to main sections and sub points, plus a "Check Your Understanding" prompt in the corner. It is perfect for lectures, tutorials, and anything you want to actually learn rather than just skim. If your content is meant to teach, this is the template to pick, and it turns how to use gpt image 2 into a genuine study tool.
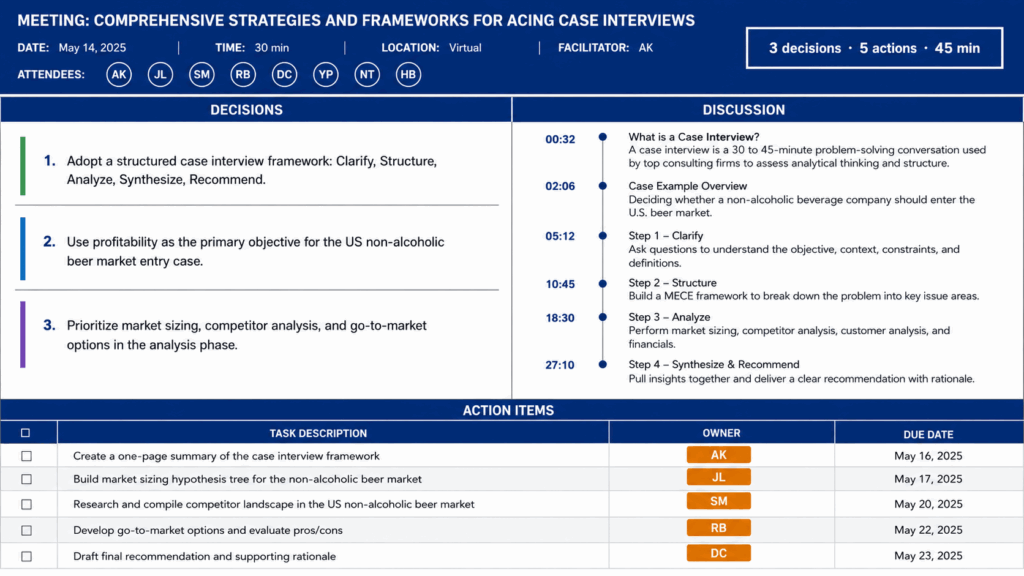
3. Meeting Recap: For Decisions and Action Items
Meeting Recap is built like a project board. A navy banner holds the title, date, and attendees, while a strict two column grid separates DECISIONS from DISCUSSION, ending with an ACTION ITEMS table with owners and deadlines. If you record meetings, this is the template that turns a rambling hour into something you can act on. It is one of the most satisfying ways to put how to use gpt image 2 into practice on real work.
4. Marketing: For High Energy Promotion
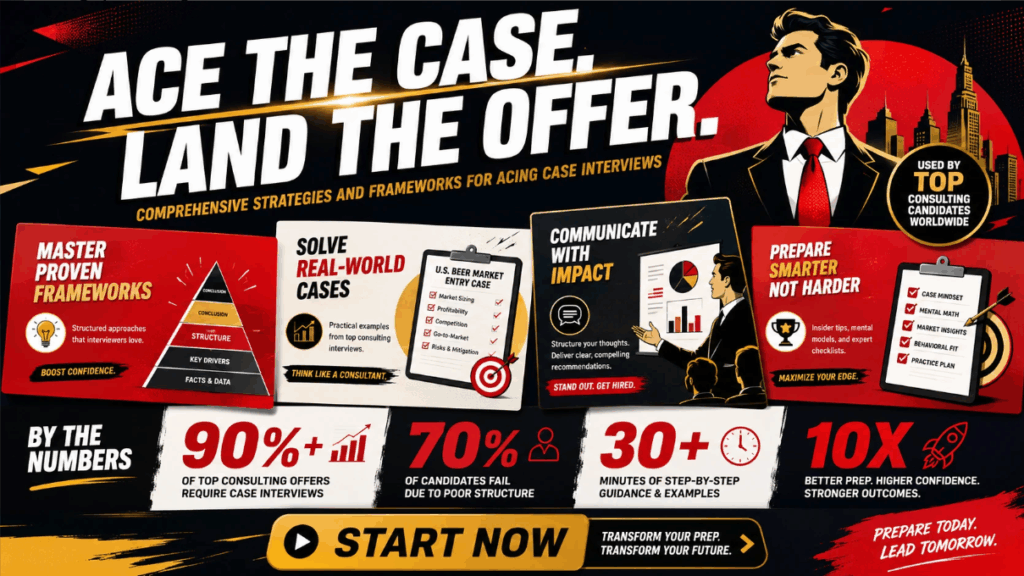
Marketing is the loud one. It builds a bold pop art poster with an oversized headline, staggered value panels, big stats, and a gold call to action button. Use it for product launches, promotions, and anything meant to grab attention on a social feed. When your content needs energy rather than restraint, Marketing is the answer, and knowing how to use gpt image 2 for promotion is a real edge for small teams, because how to use gpt image 2 for marketing means shipping visuals without a designer.
5. Story: For Narrative and Case Studies
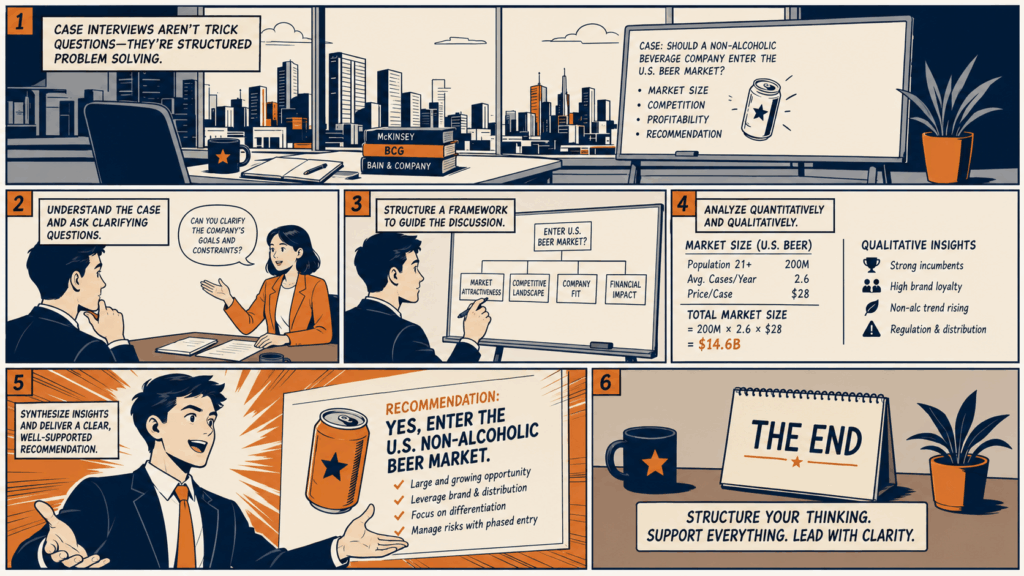
Story lays content out as a six panel comic page, complete with caption boxes and speech bubbles, ending on a "THE END" panel with a single takeaway. It is ideal for case studies, testimonials, and any content that works best as a sequence of events. If your material has a beginning, middle, and end, Story makes that arc visible. That narrative touch is part of what makes how to use gpt image 2 so flexible, and a memorable example of how to use gpt image 2 beyond the basics.
6. Research: For Academic and Technical Content
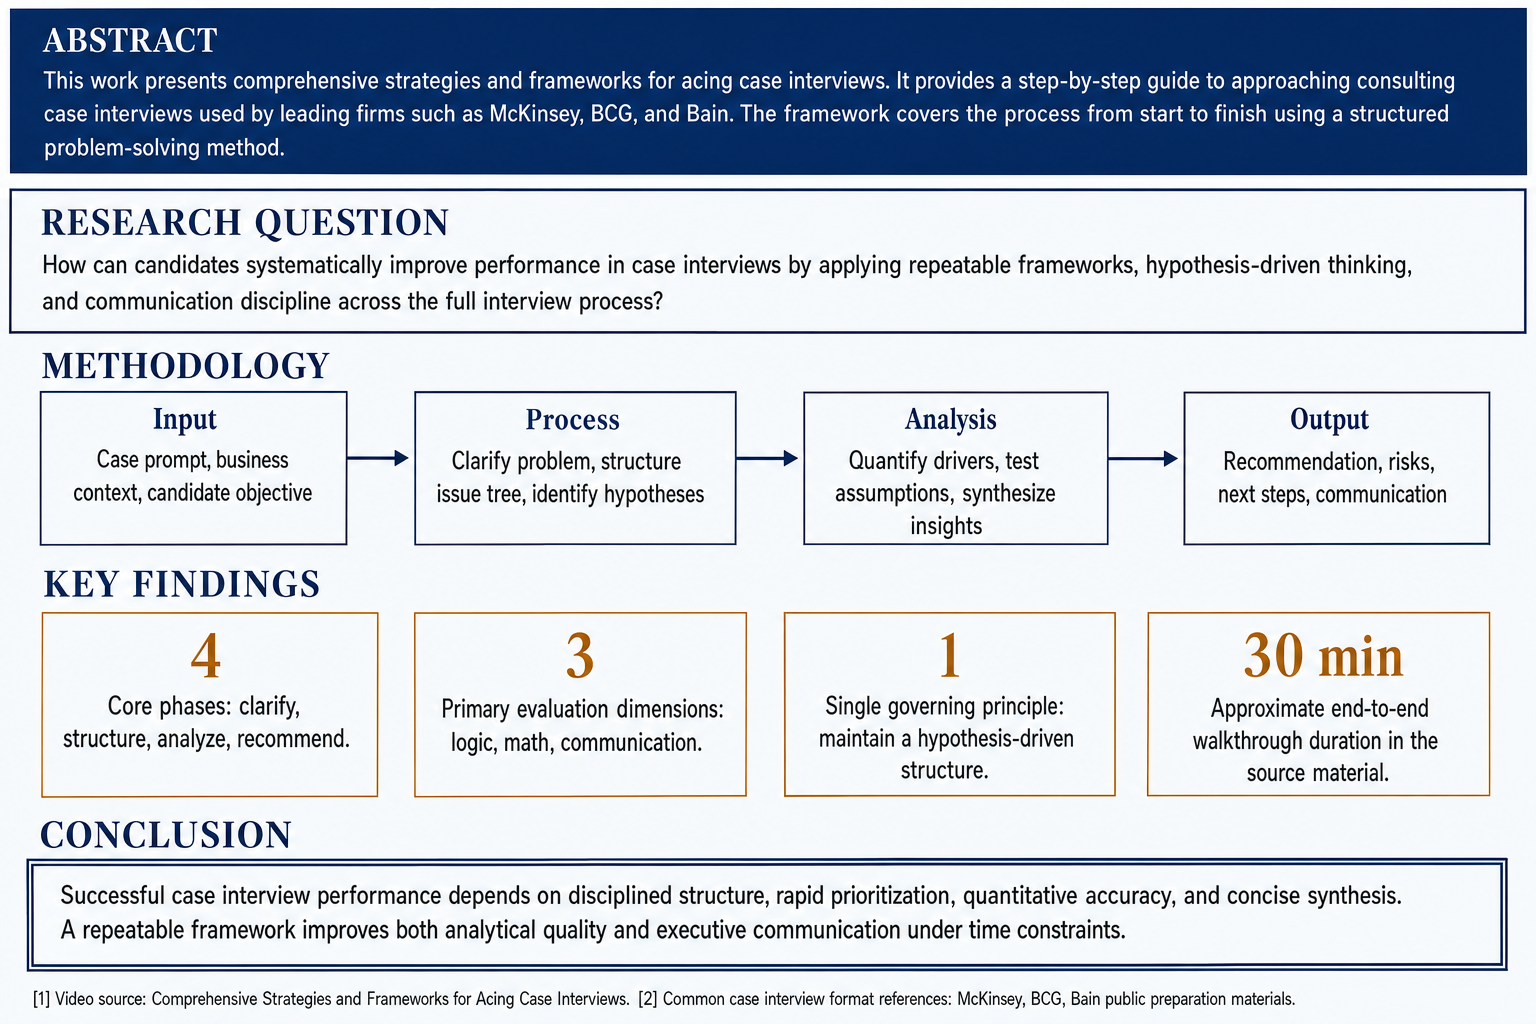
Research follows the classic IMRaD structure: abstract, research question, methodology, key findings, and conclusion, arranged as a formal academic poster in navy and gold. It is the template to use for papers, reports, and anything that needs to look rigorous and credible. Learning how to use gpt image 2 for academic work starts with this template, and it shows how to use gpt image 2 for serious, detail heavy content.
7. Interview: For Q&A and Pull Quotes
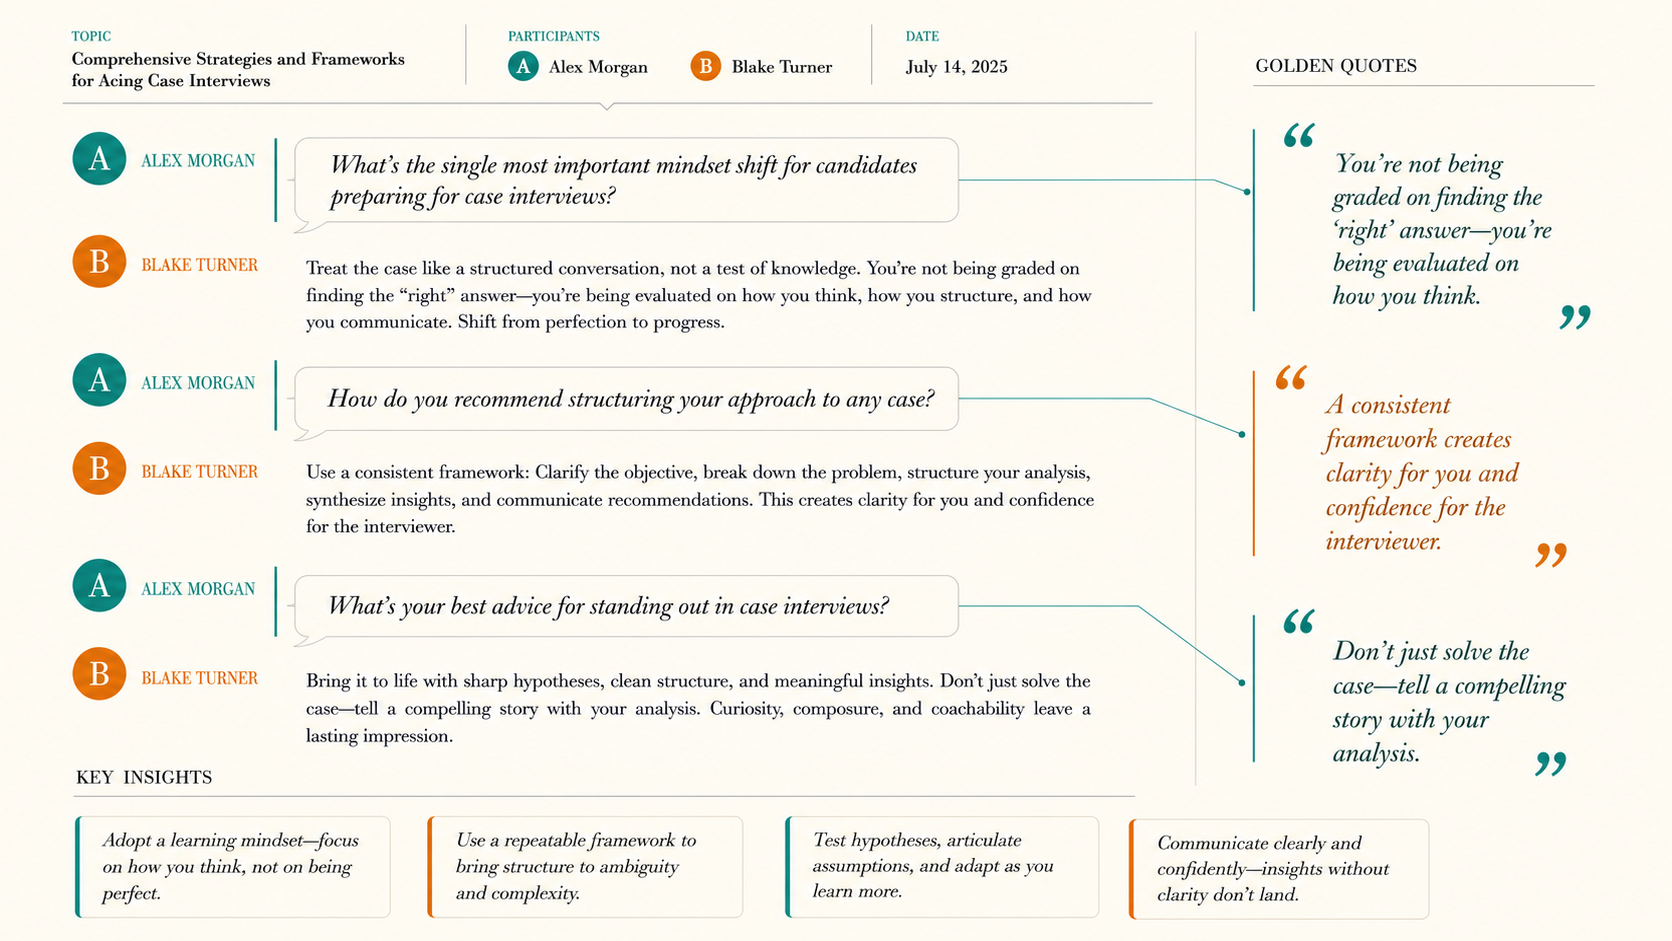
Interview reproduces the feel of a magazine spread. Golden quotes sit in a sidebar while the main column runs a Q&A flow, and a row of key insight cards closes it out, with each speaker color coded. Use it for interviews, podcasts, and panel discussions where the voices matter. It is the clearest way to show who said what, and once you see how to use gpt image 2 for interviews you will want one for every recording, because how to use gpt image 2 for interviews is the fastest way to publish a conversation.
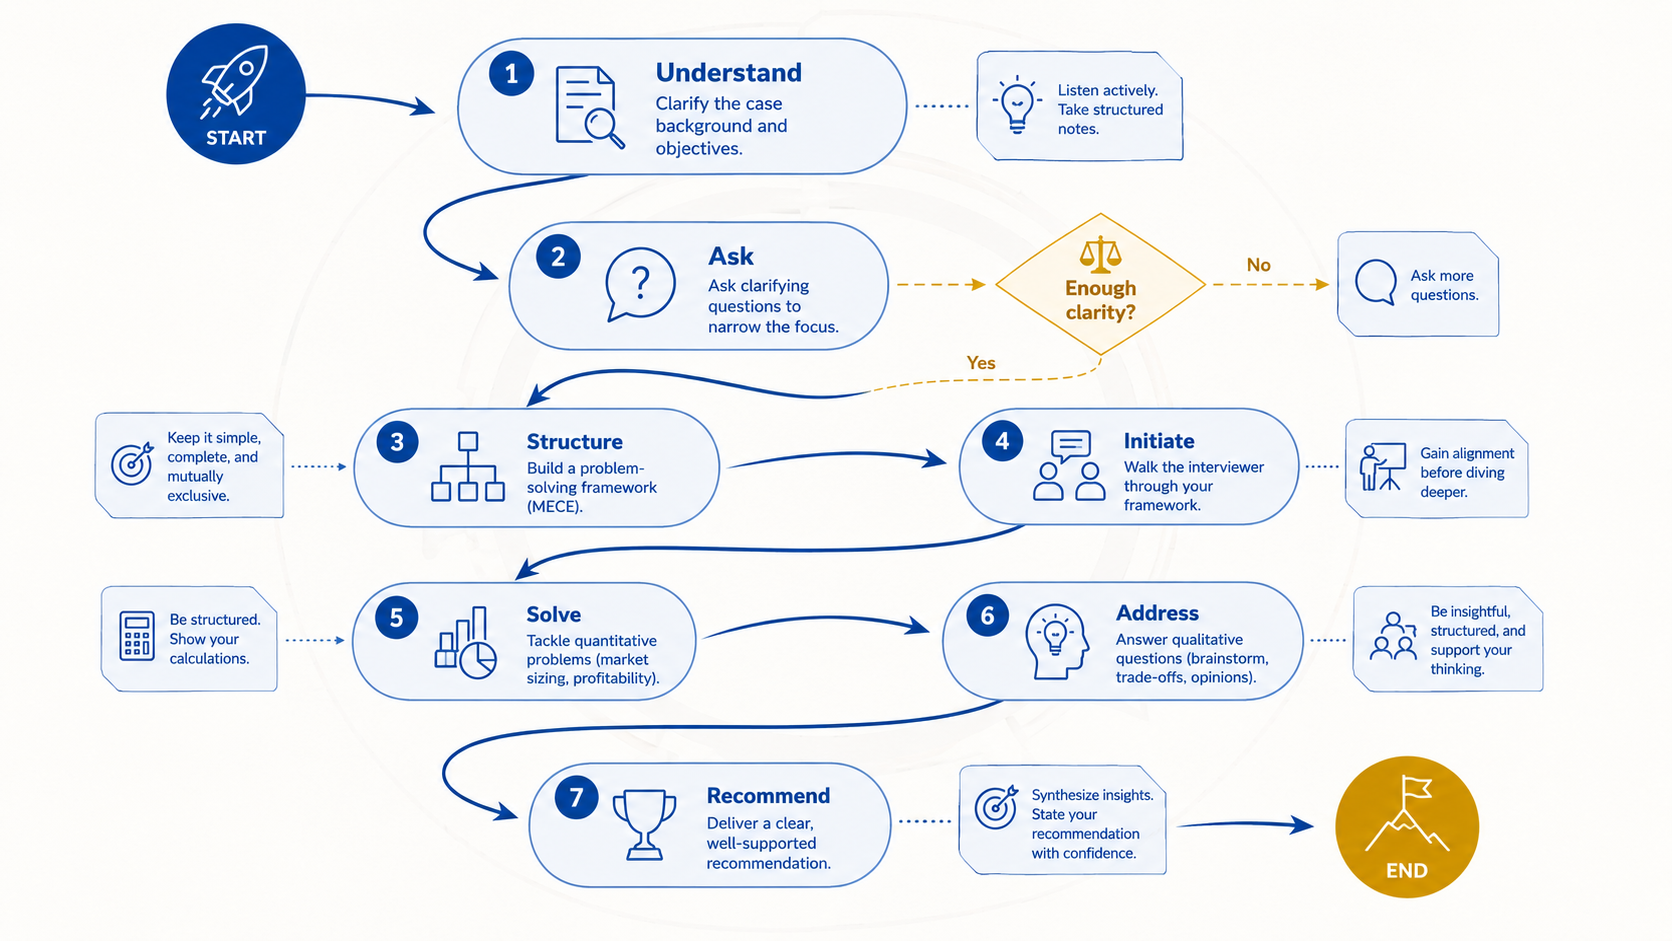
8. Flowchart: For Processes and Steps
Flowchart draws an elegant S curve of rounded action pills, diamond decisions, and circular start and end points, connected by smooth arrows. It is made for processes, how to guides, and decision paths. When your content is a sequence of steps or choices, this template turns it into a map your reader can follow. It is one more example of how to use gpt image 2 to make structure visible, and a favorite for anyone who learns how to use gpt image 2 for documentation.
Pro Tips for Better GPT Image 2 Infographics
A good tool gets better with a little technique. These three habits will lift the quality of every infographic you make, and they apply no matter how to use gpt image 2 fits into your day. Think of them as the finishing school of how to use gpt image 2.
Tip 1: Match the Template to Your Content Type
The single biggest quality lever is picking the right template. A meeting recap squeezed into the Story template will look odd, just as a marketing poster inside Meeting Recap will feel flat. Before you generate, ask what this content is for, then pick the template built for that job. This one habit is the fastest route to a professional looking result, and it is the first rule of how to use gpt image 2 well.
Tip 2: Keep Text Short for Clean Labels
Even with GPT Image 2, long labels are where infographics tend to break. Keep headings short, and let the summary carry the detail. A few crisp words per section read better and render more reliably than a paragraph squeezed into a card. Short text is the quiet secret behind most great infographics, and it matters more once you learn how to use gpt image 2 for dense content.
Tip 3: Refine with a Follow-Up Prompt
Your first infographic is rarely your last. If a label is off or the palette feels wrong, tweak the prompt and generate again. Because regeneration is quick, you can iterate until it looks right. This is how professionals approach how to use gpt image 2: they refine in small steps rather than starting over.
Frequently Asked Questions
Here are the questions people ask most often about the feature.
Which Templates Can I Choose From?
Summary Infographic offers eight templates: Quick Summary, Learning Guide, Meeting Recap, Marketing, Story, Research, Interview, and Flowchart. Each one is tuned for a different content type, so you can match the layout to your material instead of forcing everything into a single style. That range is a big part of why how to use gpt image 2 feels so approachable.
Can I Write My Own Prompt Instead of a Template?
Yes. The templates are a fast starting point, but you can also write a custom prompt to describe the exact layout, palette, and labels you want. This gives you full control over the result, which is one of the reasons people keep coming back to learn how to use gpt image 2 their own way, and it puts you fully in charge of how to use gpt image 2.
Does GPT Image 2 Handle Text in Infographics Well?
It is one of the strongest models for in image text. Labels and numbers come out legible far more often than with earlier models, which is why it works so well for infographics. That said, keeping labels short and reviewing the result is still the smart habit, and it is a small step that makes how to use gpt image 2 more reliable.
Can I Turn Any Transcript into an Infographic?
Yes. Whether it is a lecture, a meeting, an interview, or a podcast, the flow is the same: transcribe, summarize, pick a template, and generate. That is the whole point of learning how to use gpt image 2 inside a tool that already handles the transcription and summary for you. It removes every boring step, leaving only how to use gpt image 2 in its purest form.
Conclusion
Learning how to use gpt image 2 does not have to mean learning design. With Video Transcriber AI and its Summary Infographic feature, your transcript becomes a summary, and your summary becomes a visual, all in one place. Whether you are turning a meeting into an action plan with Meeting Recap or a lecture into a study sheet with Learning Guide, the eight templates give you a head start, and GPT Image 2 handles the hard part of keeping your labels clean and readable. That combination is why how to use gpt image 2 feels less like a skill and more like a shortcut.
If you have a recording sitting around that deserves better than a wall of text, now you know how to use gpt image 2 to turn it into something worth sharing. Upload your audio, pick a template, and watch it happen in minutes. There is no faster way to learn how to use gpt image 2 than to simply start. Once you understand how to use gpt image 2 this way, you will find a reason to make a visual out of everything. So stop reading about how to use gpt image 2 and start doing it. Master how to use gpt image 2 once, and every transcript you touch becomes more useful. That is everything you need to know about how to use gpt image 2 to generate infographics.